
dtf transfer size guide
DTF Transfer Size Guide: A Comprehensive Overview (Updated 05/04/2026)
Navigating DTF transfer sizing is crucial for quality prints. This guide offers detailed charts and pro tips for t-shirts, hoodies, and onesies, ensuring optimal branding and customer satisfaction.
Direct-to-Film (DTF) transfer sizing is a foundational element in achieving professional-grade results. It’s more than simply matching a design’s dimensions to a garment; it’s about understanding how size impacts the overall aesthetic, wearability, and customer perception. A correctly sized transfer elevates branding, while an incorrect size can lead to dissatisfaction and costly reprints.
This guide serves as a comprehensive resource, updated as of May 4th, 2026, to navigate the nuances of DTF transfer sizing. We’ll explore standard sizes for various garments – from adult tees to infant onesies – and delve into precise measurement techniques. Accurate sizing prevents issues like transfers folding into pockets, a common frustration for printers.
Furthermore, we’ll emphasize the importance of considering garment cut and individual customer preferences. Whether you’re producing bulk orders via gang sheets or personalized items, mastering DTF transfer sizing is paramount to success. Remember, sizing isn’t just technical; it’s a key component of your brand’s quality promise.
Why Accurate DTF Transfer Size Matters
Precise DTF transfer sizing directly correlates with print quality and customer satisfaction. Transfers that are too large can bleed onto seams or distort the design, creating an unprofessional appearance. Conversely, undersized transfers can appear disproportionate and diminish the impact of the artwork.
Beyond aesthetics, accurate sizing minimizes waste. Incorrectly sized transfers necessitate reprints, increasing costs and delaying order fulfillment. Avoiding issues like folding into pockets – a common problem – saves both time and materials; A paper test print is a valuable precaution when uncertainty exists.
Furthermore, consistent sizing builds trust with your clientele. A well-sized print communicates attention to detail and a commitment to quality. This is especially crucial for brands focused on streetwear, personalized gifts, or any application where presentation is key. Investing in tools like DTF alignment ruler sets ensures repeatable, professional results across all garment types.
The Impact of Sizing on Branding and Customer Satisfaction
DTF transfer sizing is far more than a technical detail; it’s a critical component of your brand identity. Consistent, accurate sizing projects professionalism and demonstrates a commitment to quality, enhancing brand perception. A poorly sized print can cheapen the look of even the most creative designs, damaging brand equity.
Customer satisfaction is directly linked to print presentation. Customers expect designs to appear as intended – proportionate, well-placed, and free from distortion. Incorrect sizing leads to complaints, refunds, and negative reviews, impacting your reputation.
Consider customer preferences; slight adjustments for garment cut are often necessary. Offering a preview, like a cutout, can manage expectations and ensure alignment with individual tastes. Prioritizing accurate sizing fosters loyalty and encourages repeat business, solidifying your brand’s positive image within the market.

Standard DTF Transfer Sizes for Common Garments
Explore typical DTF transfer dimensions for adult, youth, toddler, and infant apparel, including t-shirts, hoodies, and onesies. Charts provide maximum width and height guidelines.
DTF Transfer Sizes for Adult T-Shirts
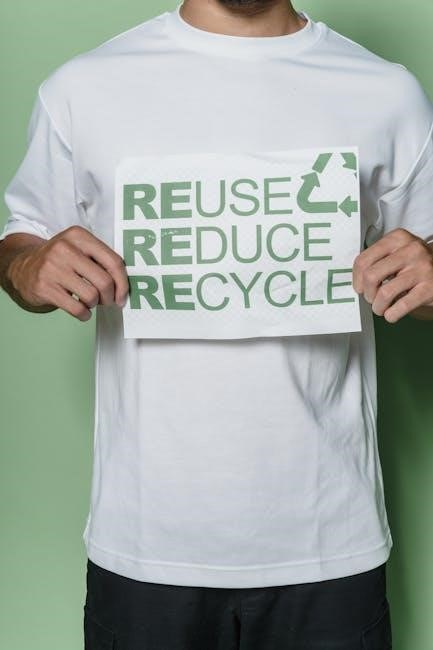
Determining the correct DTF transfer size for adult t-shirts is paramount for a professional finish. Generally, chest prints fall within a maximum width and height range of 10” x 12”, though this varies based on the t-shirt size and desired design aesthetic. For a standard medium adult t-shirt, a transfer size of 9” x 10” often provides an excellent balance between visual impact and comfortable wear.
Larger sizes, up to 12” x 14”, are suitable for oversized designs or larger shirt sizes (XXL and beyond). Conversely, smaller designs, like left chest or pocket prints, typically measure around 3” x 4”. Remember to account for garment cut – shirts can vary slightly in dimensions. Always consider customer preferences; some may prefer a more subtle or bolder print.
Pro Tip: Before bulk printing, conduct paper test prints to visualize the final size on the garment. This simple step can prevent costly errors and ensure customer satisfaction. Adjust slightly for the specific garment cut and individual customer preferences.
DTF Transfer Sizes for Youth T-Shirts
Sizing DTF transfers for youth t-shirts requires careful consideration due to their smaller dimensions compared to adult sizes. A common range for chest prints on youth shirts is 8” x 10”, but this is highly dependent on the age/size of the shirt. For youth sizes XS-S (typically ages 2-4), a transfer size of 7” x 8” often works best, ensuring the design isn’t overwhelming.

As the youth size increases (M-XL, ages 6-14), you can scale up to 9” x 11”. It’s crucial to avoid excessively large designs that can appear disproportionate on smaller frames. Pocket prints for youth shirts are generally around 2” x 3”. Utilizing DTF alignment ruler sets can eliminate guesswork and ensure consistent placement across various youth sizes.
Remember: Youth garments often have different cut characteristics than adult shirts. Always verify sizing with a paper test print before committing to a full production run. Adjust slightly for garment cut and customer preferences.
DTF Transfer Sizes for Toddler & Infant Onesies
Designing for toddler and infant onesies demands the most delicate approach to sizing. Due to the limited printable area and the garment’s shape, smaller designs are generally preferred. For infant sizes (0-6 months), a maximum transfer size of 5” x 6” is recommended, centering the design on the chest. Larger designs can cause discomfort or restrict movement.
Toddler sizes (6-24 months) can accommodate slightly larger transfers, typically up to 6” x 8”, but maintaining proportionality is key. Pocket prints, if desired, should be minimal – around 1.5” x 2”. Always prioritize soft, flexible designs that won’t feel stiff or irritating against a baby’s skin.
Crucially, consider the onesie’s snap closure placement when determining design location. Avoid designs that could interfere with the snaps. Paper test prints are essential to visualize the final look and ensure proper fit before production.
DTF Transfer Sizes for Hoodies & Sweatshirts
Hoodies and sweatshirts offer a larger canvas, but sizing still requires careful consideration. For adult sizes, a standard chest print can range from 9” x 12” to 11” x 14”, depending on the desired impact and garment size. Sleeve prints typically max out at 3” x 4” to avoid restriction of movement and ensure comfortable wear.
Youth hoodies can accommodate designs up to 8” x 10” for the chest. Remember that oversized designs can distort when the garment is worn or washed. Gang sheet considerations are vital for bulk printing; optimize layout to maximize transfer yield.
Always account for potential garment cut variations. A slight adjustment in size may be necessary to ensure consistent placement across different brands and styles. Prioritize designs that complement the hoodie’s overall aesthetic and avoid obstructing functional elements like pockets or drawstrings.
Placement & Measurement Techniques
Precise placement and accurate measurements are key to professional DTF transfers. Utilize the “finger method” or alignment rulers for consistent results across all garment types.

Determining Optimal Placement: The “Finger Method”
The “finger method” provides a quick, though less precise, way to determine optimal DTF transfer placement, particularly for chest prints on t-shirts. This technique relies on using your fingers as a measuring tool, estimating the desired distance from the neckline. Many printers find that positioning the design approximately three and a half fingers down from the collar results in a placement around 2.5 inches.
However, it’s crucial to acknowledge the inherent variability of this method. Finger sizes differ significantly between individuals, leading to inconsistent results. While convenient for a fast assessment, the finger method isn’t ideal when repeatable precision is paramount. It serves best as a starting point, requiring adjustments based on garment size and design aesthetics.
For those prioritizing consistency, especially in a production environment, supplementing the finger method with more accurate tools, like DTF alignment ruler sets, is highly recommended. These rulers eliminate guesswork and ensure uniform placement across various garment sizes – adult, youth, toddler, and infant.
Using DTF Alignment Ruler Sets for Precision
DTF alignment ruler sets represent a significant upgrade over the “finger method” for achieving precise and repeatable transfer placement. These tools are specifically designed to eliminate guesswork, ensuring consistent results across a wide range of garment sizes and styles – from adult tees to infant onesies.
A quality ruler set typically includes multiple guides calibrated for different measurements, allowing you to accurately position designs relative to the neckline, sleeves, or other key garment features. They streamline the alignment process, reducing errors and minimizing wasted materials.
Investing in a reliable alignment ruler set is particularly beneficial for businesses handling bulk orders or offering customized designs. The increased precision translates to higher-quality finished products, improved customer satisfaction, and reduced reprint requests. They are an essential tool for professional DTF application, guaranteeing a polished and consistent look every time.
Measuring Maximum Width and Height for Transfers
Accurately determining the maximum width and height for your DTF transfers is paramount to a successful application. These dimensions dictate the largest printable area, ensuring your design fits the garment without distortion or unwanted cropping. Always refer to detailed size charts specific to the garment type – t-shirts, hoodies, or onesies – as sizes vary considerably.
When measuring, consider the garment’s cut and potential shrinkage. It’s wise to slightly adjust the transfer size to accommodate these factors, preventing issues like folding into pockets. Remember that all values typically represent the maximum dimensions; you can always scale down, but exceeding these limits will cause problems.
Prior to final production, utilize paper test prints and cutout previews to visualize the design scale on the garment. This proactive step helps confirm the size and placement before committing to film and ink, saving time and resources. Precise measurement is key to professional-looking results.
Specific Garment Considerations
Each garment type—t-shirts, hoodies, sleeves, and pocket prints—demands unique sizing approaches. Adjustments are vital for optimal design placement and a professional, finished look.
Sizing for T-Shirt Chest Prints
Determining the ideal size for chest prints on t-shirts is paramount for a visually appealing and professional result. A common starting point utilizes the “finger method,” suggesting approximately 2.5 inches down from the collar, achieved by measuring roughly three and a half finger widths. However, recognizing that finger sizes vary, this method is best suited for quick estimations rather than precise, repeatable outcomes.
For consistent accuracy, investing in DTF alignment ruler sets is highly recommended. These tools eliminate guesswork, providing reliable measurements across adult, youth, toddler, and infant sizes. Remember that maximum width and height are key considerations, and these values should be adjusted slightly to accommodate variations in garment cut and individual customer preferences.
Always prioritize a paper test print to visually verify the size before committing to film. This simple step can prevent costly errors and ensure the design scale is precisely as intended. Careful consideration of these factors will elevate the quality of your t-shirt prints and enhance customer satisfaction.
Sizing for Sleeve Prints
Sleeve prints require careful consideration due to the limited printable area and the garment’s natural curvature. Unlike chest prints, sleeve designs generally need to be smaller and more streamlined to avoid distortion or an awkward appearance. Maximum width and height are significantly restricted compared to central designs.
Prior to production, a paper test print is absolutely essential. This allows for a visual assessment of the design’s scale and placement on the sleeve, ensuring it complements the garment’s shape without appearing cramped or disproportionate. A cutout preview can further aid in visualizing the final result before wasting valuable film.
Remember to account for potential garment cut variations and customer preferences. Some may prefer a more subtle sleeve print, while others might opt for a bolder statement. Adjusting the size accordingly demonstrates attention to detail and enhances customer satisfaction. Gang sheet considerations are less critical for sleeves, focusing instead on precise individual sizing.
Sizing for Hoodie/Sweatshirt Designs
Hoodie and sweatshirt designs present unique sizing challenges due to the garment’s thicker fabric and often larger surface area. Central designs, similar to t-shirts, require careful measurement of maximum width and height, but consider the potential for distortion across seams or folds.
Placement is key; designs too high can appear awkward, while those too low may be obscured when the garment is worn. A paper test print is invaluable for verifying size and position before committing to a full production run. Visualize the design’s impact on the overall garment aesthetic.
Gang sheet considerations become particularly important for bulk hoodie/sweatshirt printing. Efficient layout maximizes material usage while maintaining consistent quality. Adjusting for garment cut and customer preferences is crucial – some prefer larger, bolder designs, while others favor a more understated look. Prioritize clarity and visual appeal.

Sizing for Left Chest/Pocket Prints
Left chest or pocket prints demand precision due to their smaller size and prominent placement. These designs typically range from 2.5 to 4 inches in width and height, but variations exist based on garment style and customer preference. Accurate measurement is paramount to avoid distortion or an ill-fitting appearance.
Consider the pocket’s dimensions if printing directly over it. Ensure the design doesn’t bleed onto the pocket flap or appear cramped within its boundaries. Utilizing DTF alignment ruler sets guarantees consistent placement across multiple garments, eliminating guesswork and improving efficiency.
Subtle adjustments can significantly impact the final result. A slightly smaller design may appear more refined, while a larger one can make a bolder statement. Always prioritize legibility and visual balance. Paper test prints are essential for verifying size and ensuring the design complements the garment’s overall aesthetic.

Advanced Sizing & Pro Tips
Mastering DTF sizing involves paper tests, cutout previews, and adjusting for garment cut. Gang sheet planning maximizes efficiency, while addressing folding issues ensures flawless results.
Paper Test Prints for Size Verification
Before committing to a full DTF transfer print, utilizing paper test prints is an invaluable step for size verification. This simple practice can save significant time, materials, and potential customer dissatisfaction. The core principle is to print a scaled-down version of your design onto standard paper, mimicking the intended size on the garment.
This allows you to visually assess the design’s proportions and placement without wasting expensive DTF film and ink. Specifically, if you’re uncertain about the scale, a paper test provides a tangible representation. Kingdom DTF emphasizes this, noting that a paper test is crucial if you’re unsure about the final size.
Carefully compare the paper print to a garment of the intended size. Consider the design’s relationship to the neckline, sleeves, or other key features. This preliminary check helps identify potential issues like designs being too large, too small, or awkwardly positioned. Remember to account for any desired margins or breathing room around the design. By proactively verifying the size with a paper test, you minimize the risk of errors and ensure a professional, polished final product.
Cutout Previews to Visualize Design Scale
Complementing paper test prints, creating a physical cutout preview offers another powerful method for visualizing your DTF design’s scale on a garment. This technique involves printing your design at the intended size, then carefully cutting it out from the printed sheet.
Position the cutout directly onto the garment to assess its visual impact and ensure it aligns with your expectations. This hands-on approach allows you to see how the design interacts with the fabric’s shape and contours, revealing potential issues that might not be apparent on a flat paper test. Kingdom DTF highlights the benefit of a cutout preview – helping you visualize before wasting film.
Consider the overall aesthetic balance. Does the design feel proportionate to the garment? Is it positioned correctly for maximum impact? This step is particularly useful for complex designs or when working with unfamiliar garment styles. By physically manipulating the cutout, you gain a clearer understanding of the final result and can make adjustments before proceeding with the full DTF transfer process, ultimately enhancing the quality and customer satisfaction.
Adjusting for Garment Cut and Customer Preferences
Recognizing that garment cuts vary significantly, even within the same size category, is vital for accurate DTF transfer sizing. Factors like shoulder slope, body length, and overall fit can influence how a design appears when applied. DtfTransferUs emphasizes adjusting slightly for garment cut.
Always account for potential variations and be prepared to make minor adjustments to your transfer size accordingly. Furthermore, consider customer preferences. Some individuals prefer a more fitted look with smaller designs, while others favor a bolder statement with larger prints.
Offering customization options or providing size recommendations based on garment style can enhance customer satisfaction. Proactively addressing these nuances demonstrates attention to detail and a commitment to delivering a personalized experience. Remember, a well-sized transfer not only looks visually appealing but also reflects your brand’s dedication to quality and customer care, minimizing potential refunds or reprints.
Gang Sheet Considerations for Bulk Printing
When utilizing gang sheets for bulk DTF transfer printing, strategic layout is paramount for maximizing material efficiency and minimizing waste. Carefully arrange designs, considering their individual sizes and shapes, to optimize space utilization on the sheet. Ensure sufficient spacing between transfers to prevent smudging or merging during the printing process.
Account for the printer’s margins and any necessary bleed areas. Kingdom DTF highlights the importance of testing, and a paper test print can preview the layout before committing to film.
Efficient gang sheet design reduces production costs and turnaround times. Prioritize designs with similar color palettes or ink densities to streamline the printing workflow. Thorough planning and precise execution are essential for achieving high-quality results and maintaining profitability in bulk printing operations. Remember to factor in potential variations in transfer size when arranging the sheet.
Troubleshooting Common Sizing Issues (Folding into Pockets)
A frequent issue in DTF transfer application is the transfer folding into garment pockets, particularly with chest prints. This typically occurs when the transfer is excessively large for the garment’s dimensions or the pocket itself is too shallow. Kingdom DTF directly addresses this, recommending a paper test print as a preventative measure.
To mitigate this, meticulously measure the maximum width and height available for printing, accounting for pocket placement. Reduce the transfer size slightly if necessary, prioritizing a secure fit that avoids pocket intrusion. Consider the garment’s cut and fabric type, as these factors can influence how the transfer lays.
Always perform a test application on a similar garment before committing to a full production run. Careful sizing and placement are crucial for preventing this frustrating issue and ensuring a professional, high-quality finish.